


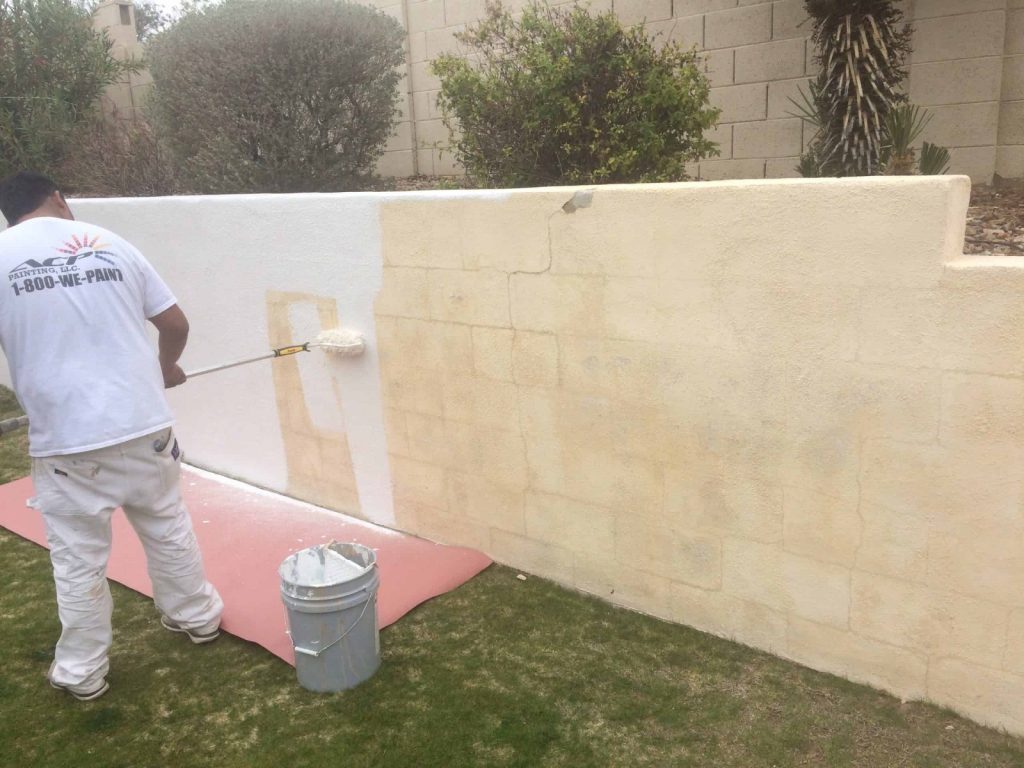
8 Tips in Preparation for the Block Wall Painting Project
Painting a block wall can dramatically transform the look of your space, but it requires more than just a brush and paint. Proper preparation is the key to a successful and long-lasting finish.
8 Tips in Preparation for the Block Wall Painting Project
Here are eight essential tips to prepare for a block wall painting project, ensuring a smooth and effective process. This will be your future guide that can make things easy for you.
1. Assess the Wall’s Condition:
Before you begin, thoroughly inspect the wall for any damage, such as cracks, holes, or moisture issues. Repairing these problems beforehand ensures a smoother painting process and a more durable finish.
2. Clean the Wall Surface:
A clean surface is critical for good paint adhesion. Remove dirt, dust, and grime from the wall using a pressure washer or a stiff brush and a mixture of water and mild detergent. Let the wall dry completely before proceeding.
3. Remove Old Paint and Loose Material:
If the wall has old, flaking paint, scrape it off to create a smooth surface. This step is crucial as painting over loose or peeling paint will lead to poor paint adhesion and longevity.
4. Apply a Suitable Primer:
Primer is essential, especially for block walls which are often porous. A good quality primer will seal the surface and provide a uniform base for the paint to adhere to. Choose a primer specifically designed for masonry or concrete surfaces.
5. Choose the Right Paint:
Select a paint that is appropriate for block walls and the environment it will be exposed to. Exterior-grade, acrylic latex paint is often recommended for its durability and resistance to weather conditions.
6. Consider Weather Conditions:
Painting in the right weather conditions is important. Avoid painting in extreme heat, cold, or during rainy or humid days. Ideal conditions are a dry day with moderate temperatures.
7. Gather Necessary Tools and Equipment:
Assemble all the tools and equipment you will need before starting. This includes brushes, rollers, paint trays, ladders, and protective gear. Ensure you have enough paint to complete the project to avoid color inconsistencies.
8. Plan Your Approach:
Have a clear plan of action. Decide where to start and finish, and how you’ll tackle corners and edges. Planning helps in achieving a consistent and efficient paint job.
Conclusion: 8 Tips in Preparation for the Block Wall Painting Project
Preparing for a block wall painting project is about paying attention to detail and understanding the unique characteristics of the surface you’re working with. By following these eight tips, you’re setting the foundation for a successful paint job. A well-prepared wall not only makes the painting process smoother but also ensures a finish that is aesthetically pleasing and long-lasting. Whether you’re a DIY enthusiast or a professional painter, preparation is the key to transforming a bland block wall into a vibrant feature of your property. Remember, the time and effort you invest in preparing the wall will be reflected in the quality of the outcome.
How to Make Your Artificial Grass Look Realistic
Artificial grass has come a long way from the days of neon-green, plastic-looking turf. Today, it’s challenging to distinguish high-quality artificial grass from the real thing. If you’ve invested in artificial grass for your lawn, you want it to look as natural as possible.

Making Your Artificial Grass Look Realistic
In this article, we’ll explore some tips and tricks to make your artificial grass installation Mesa AZ look incredibly realistic.
Choose High-Quality Artificial Grass
The journey to realistic artificial grass begins with selecting the right product. High-quality artificial grass is designed to mimic the appearance and feel of natural grass. Look for grass that comes with varying blade heights, different shades of green, and even brown thatch for authenticity.
Consider visiting a showroom or requesting samples to see and feel the grass before making a choice.
Proper Installation and Substrate
A realistic appearance starts with proper installation. Ensure that your artificial grass is installed by professionals who understand the nuances of creating a natural look. A well-prepared substrate is essential to prevent uneven surfaces and an unnatural feeling underfoot.
Most installations begin with a sturdy base, often consisting of a compacted layer of crushed rock. Make sure the installer pays attention to proper grading and drainage, which will help avoid puddles and uneven areas that can make your grass look fake.
Add Realistic Infill Material
Infill material is an essential component in making your artificial grass appear natural. This material not only adds weight and stability but also mimics the cushioning effect of soil in real grass. Choose an infill that resembles natural soil, such as sand mixed with organic materials.
Infill materials also help maintain the grass’s upright position and give it a more realistic texture. A professional installer can guide you on the right type and amount of infill to achieve the desired look.
Regular Maintenance and Grooming
Artificial grass that resembles the real thing requires regular maintenance. Grooming your grass helps keep it looking lush and natural. Use a soft-bristle brush or broom to fluff up the blades and redistribute the infill.
Remove debris like leaves and twigs regularly, as allowing them to accumulate can make your grass look untidy. Periodically rinse the surface to remove dust and keep the grass looking fresh.
Natural Edging and Landscaping
To create a seamless transition from your artificial grass to the surrounding landscape, use natural edging materials. Stone, wood, or even plantings can be used to border your lawn, making it look like an integral part of your outdoor space.
Incorporating natural landscaping elements like flower beds or shrubs near your artificial grass can also enhance the overall look. These elements add to the illusion of a real lawn, making it feel more like a part of nature.
Conclusion: Making Your Artificial Grass Look Realistic
Creating a realistic look with your artificial grass involves a combination of factors, from choosing a high-quality product to proper installation and maintenance.
With the right choices and care, your artificial grass can be so lifelike that your guests might not even realize it’s not the real thing.
Why You Should Avoid Painting Over Damaged Drywall
When refreshing the look of your walls, painting is often the go-to solution. However, that won’t be the case if your walls are damaged. It’s crucial to address any damaged drywall before picking up that paintbrush. Of course, there’s a reason for this.
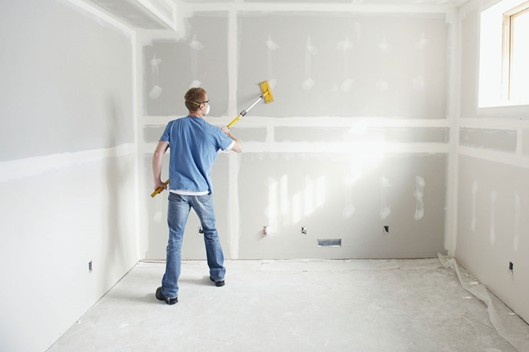
While it may be tempting to take a quick-fix approach, covering up damaged drywall with paint can lead to long-term issues and unsightly results. So, why should you avoid painting over damaged drywall? Here are several reasons to consider.
Always hire local drywall contractors to fix your drywall before painting them.
Can You Paint Over Damaged Drywall?
Painting over damaged drywall is generally not recommended. While it may seem like a quick and easy solution to conceal imperfections, it can lead to further issues.
Damaged drywall, such as cracks, holes, or water damage, needs proper repair and preparation before painting. Ignoring the underlying problems and applying paint directly over damaged areas can result in the paint not adhering properly.
Moreover, the underlying damage may worsen, causing the paint to peel or bubble over time.
Why is Drywall Repair Important Before Interior Painting?
Drywall repair before interior painting is of utmost importance for several reasons. Firstly, repairing damaged drywall ensures a smooth and even surface for the paint application. Cracks, holes, or water damage can create uneven textures and blemishes easily visible through the paint.
Secondly, repairing drywall damage helps prevent further deterioration. Ignoring damaged areas can lead to the spreading of cracks, increased water infiltration, or even mold growth, which can compromise the wall’s structural integrity and pose health risks.
Timely repairs not only maintain the aesthetics of your walls but also contribute to the long-term durability of your home.
Lastly, drywall repair allows for a more cost-effective and efficient painting process.
How Much Does Drywall Repair Cost?
The cost of drywall repair can vary depending on the extent and nature of the damage, as well as factors such as the size of the affected area and local labor rates.
Minor repairs can often be addressed with DIY methods and inexpensive patching materials, resulting in minimal costs. However, more significant damage may require professional assistance and additional materials, increasing the overall cost.
Hiring a professional drywall contractor typically involves labor charges, material costs, and any necessary equipment or tools. On average, the drywall repair cost can range from $200 to $800 or more, depending on the project’s complexity.
DIY vs. Professional Drywall Repair
Regarding drywall repair, homeowners often decide whether to tackle the project themselves or hire a professional. Both DIY and professional drywall repair options have their pros and cons.
DIY drywall repair can be cost-effective, especially for minor repairs like small holes or cracks. However, DIY drywall repair requires some level of skill and experience.
On the other hand, hiring a professional for drywall repair offers several advantages. Professionals have the expertise and specialized tools to handle various types of damage with precision and efficiency. While professional drywall repair comes at a cost, it offers higher quality and convenience.
Common Mistakes to Avoid when Building a Fence
Embarking on a fence-building project is an exciting endeavor that can enhance your property’s privacy, security, and aesthetic appeal.

To build a fence, you must be aware of common pitfalls. From improper planning and material selection to construction errors and legal considerations, there are mistakes you need to be wary of to avoid.
Today, we’ll share some common mistakes that homeowners often encounter when building a concrete block fence.
Not Meeting Council Regulations
Note that council regulations are in place to ensure your neighborhood’s safety, functionality, and aesthetics. Failing to meet these regulations can result in legal consequences.
Moreover, non-compliant fences may also affect your property value and cause conflicts with your neighbors.
If you adhere to council regulations, you ensure that your fence is constructed within the designated guidelines, such as height restrictions, setback distances, and material limitations.
That is why it’s advisable to research and consult with your local council or municipality to understand the specific regulations that apply to your area.
Choosing Sub-Par Suppliers
Choosing a sub-par supplier when building a fence can lead to numerous complications and unsatisfactory outcomes. The quality of materials and services provided by your supplier directly impacts your fence’s durability, appearance, and longevity.
Opting for a sub-par supplier may result in low-quality materials that deteriorate quickly. A sub-par supplier may also lack expertise and professionalism. This can lead to an unstable or improperly constructed fence that compromises its functionality and poses safety risks.
Choosing a Style That Clashes with the Architecture
Your home’s architectural style has a distinct character and aesthetic, and choosing a fence that complements it creates a cohesive and unified look.
A mismatched fence can create a jarring visual contrast, detracting from the beauty of the fence and the home.
Consider factors such as your home’s materials, colors, and design elements when choosing a fence style. Strive for a complementary blend that enhances the architectural features, whether it’s a modern, traditional, or eclectic design.
Choosing The Wrong Material Based on Your Location
Different geographical locations present varying weather conditions and environmental factors that can significantly impact the performance of your fence.
For instance, if you live in a coastal area with high humidity and salt exposure, choosing a material resistant to corrosion, such as aluminum or vinyl, is crucial to prevent premature deterioration.
In areas prone to strong winds or storms, opting for a sturdy and wind-resistant material like steel or concrete can help your fence withstand harsh weather conditions.
Similarly, considering factors such as rainfall, temperature fluctuations, and sunlight exposure in your location can guide you toward materials that are best suited for those specific conditions.
Forgetting To Budget for Maintenance Costs
Forgetting to budget maintenance costs when building a fence can lead to unexpected expenses and potential deterioration over time.
While the upfront cost of installing a fence may be significant, it’s important to consider the ongoing maintenance requirements to keep your fence in optimal condition.
Different fence materials require varying levels of maintenance, such as regular cleaning, staining, sealing, or repairs.